Monday, 29 August 2011

Polka dot refashion

Ahhh, what's this? A refashion? It's been quite a while. But I won't bore you with my excuses. Just an apology for poor quality photos.


This started out as a second hand blouse with a zip up the back. It had been handmade by someone once and is made in a synthetic fabric. After I bought it, it languished in my wardrobe for about 8 months. I liked it in theory but everytime I put it on I felt awkward. The neck was too high on me and the sleeves came down past my knuckles. There was just TOO much of the blouse. It seemed to scream "I have an art degree" at me. (Do you know what I mean?) Anyway, I only thought last week of refashioning it while I was having a bit of a wardrobe clearout. (More on that in another post)
I unpicked the zip and the high neckband. Then I recut the neck with a scoop t-shirt shape. I used some yellow bias binding that was at the bottom of a binbag of second hand fabrics. I do like a nice pop of bright yellow against black and white. I made a simple loop fastening with a daisy button and stitched up where the zip had been as far as possible while still allowing myself to get the shirt on. I cut the sleeves and hemmed them with the bias trim about 1/2 inch above the hemline. Then I inserted elastic into the casing to give the sleeve hem a bit of shape.

I am much, much happier now with this top. I mean, polka dots, yellow trim, daisy button...what more can I ask for? I have been planning my autumn sewing (note to self, that means another promise of a future post!) and I am hoping this will fit with my planned grey trousers and also with some of my existing me-mades.


And on a final note, I am signing up for Self Stitched September 2011, but do you know what? This time I am taking the pressure off myself and I am not doing daily photos. I haven't decided yet how I will do it instead. I thought about not taking part this time as I don't have lots of new me-mades to share and it could be a bit dull and repetitive viewing. BUT I do hate to be left out. You will probably be seeing this polka dot top in September.


Tuesday, 23 August 2011

And my thanks go to...

A while ago the lovely Caroline from Gran Plumley nominated me for a Versatile Blogger award. Thank you Caroline.
I am supposed to tell you seven things about me, hopefully things that you don't already know, well I couldn't think what to tell so here are some random things:


1. I bought this Quiksilver bag for £1 in a Devon charity shop two weeks ago. I love it as it is big enough to hold drinks for me and Little I without being bulky. I can fit a paperback in there too. It also has a good size phone pocket, a camera pocket and a keys pocket. Plus it has little bits of red trim on. What more can I ask for?


2. I like the little things in life. I like blogs that celebrate this. See no. 3.


3. I have a new ring from here
Do you like it? It makes me smile.


4. My mum taught me to sew and until recently she was my go-to reference person for sewing advice and techniques. Yes, I would phone her (200 miles away) and ask questions about bias binding or preparing fabric.


5. Now my mum has memory problems, this is my go-to reference book for sewing techniques. I found it in my local library a couple of years ago


and a friend then kindly bought it for me for my birthday. I think finding a sewing reference book you can really get on with is quite a personal and individual thing, not everyone will like working from the same book.


I don't have any affiliation to Ruth Singer but I love this book, it has clear step by step instructions and photos. She also has a blog here. I have included a photo of the page on bound buttonholes (see I am always thinking of you, Ms Scruffybadger)


6. With regard to memory problems, I am taking part in a sponsored walk for the Alzheimer's Society next month. Somewhat ironically, I had forgotten all about it until today and haven't got any sponsors yet. Ooops. Let's hope I remember to turn up onthe day.

7. Ummm, can't think of a number seven fact...errr...how about this? I was doing a PhD in my mid-twenties, I left with an MPhil, having had to decide whether to take the MPhil or do substantive rewriting (unfunded) and I think walking away from the PhD was one of the best decisions I ever made! Seriously, I think it saved my sanity. My thesis resides in a cupboard at my mum's house, though I believe it would make a good doorstop. It took about five years until I could bear to look at it after completion. It also took a long time before I would tell anyone about it as I thought it meant I was a failure. I always used to think that I shouldn't give up on anything because you should doggedly See Things Through. Now I think that sometimes you should walk away from some things in your life and that to leave can take more courage than to stay. (Is that a bit too serious for this blog? Caroline, look what you have started!)

Now I am supposed to nominate five blogs to receive this award, these people may have already had this award, sorry if you have, but at least you can feel a warm glow of happiness (??)


Saturday, 20 August 2011

Sewing for others - explorer waistcoat


After finishing my Summer Essentials sewing I have taken a break from sewing for me.

Instead, I've made this waistcoat for T from "Little Things to Sew" by Liesl Gibson. It is a lovely book of projects to make for children. With beautiful illustrations, that will look familiar to anyone who knows Liesl Gibson's pattern line Oliver+S.


I used some camo fabric that I was given on freecycle about three years ago.
You can see the waistcoat in the book is much more preppy looking. However, T wanted something for being out in the woods and chose the camo fabric from my stash. I was a little concerned he would look like someone waiting in the back woods for the end of the world, but I guess at eight years old you can get away with a bit of camoflauge. He requested no buttons so there are none.


The lining is made with the remnants of fabric I used to make my trousers and skirt. The arm edges are bound with self made bias binding.

The instructions are clear with diagrams and easy to follow.

The trickiest bit was making three pockets (two front, one back) with bellows. The book gives you the choice of patch pockets or the bellows ones. I am glad though that I did the bellows as they give more roomy pockets for collecting treasure. Now I have made them once I have been thinking they would be great pockets for a bag.

Friday, 19 August 2011

Summer holidays

Picking beans at Grandma's

I didn't mean to take an extended break from this space!


There is not much sewing going on here as we are deep into the summer holidays. I am finishing off a piece of sewing for my son at the moment, to be blogged soon, and making vague autumnal plans. This is a picture heavy post and I know blogs are currently full of holiday photos but indulge me...honestly these are heavily edited.


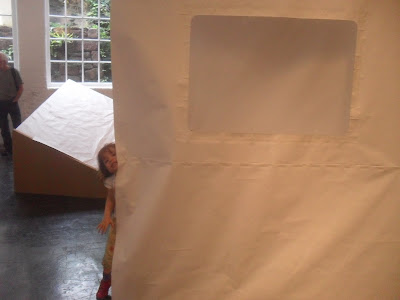
We did a paper monster making workshop at this art gallery. Ther's a pop up paper cafe where you can have coffee and do some paper craft, it's still on if you are in the Exeter area in August. Can you see that Little I is going into a giant window paper envelope?


Back in Shropshire we have been camping...


Today we did a fab bushcraft family day (free thanks to PCT funding).


Eating fish cooked on the open fire. ("Mmmmm, yummy")


Shelter buildingLearning to use fire sticks to light a fireNot surprisingly this is the end of most days. They do both have separate beds of their own but often like to fall asleep in one bed together.


I will be back soon with normal service, some recent charity shop finds and a bit of sewing.

Wednesday, 3 August 2011

Flirting the Issue Duvet Skirt


The final item from my Summer Essentials sewing list is the Flirting the Issue skirt from Anna Maria Horner. This is a free pattern/tutorial you can download as a pdf here. It is very simple though and probably many of you could whip it up in no time. Just a rectangle of fabric and a rectangle of lining, side seams and join the lining and main fabric together at the top, then you make four sets of casing for elastic, thread through the elastic and hem. I made life more complicated for myself as I had the not very genius idea of making it reversible. (At the time I thought this was such a clever idea). It just got complicated trying to match


the hem of the lining with the main fabric hem. I had to unpick and re-do it.
The main fabric used was a duvet cover from the charity shop. In my great wisdom I decided piped patch pockets were an essential to this skirt. There is something about the fabric that to my mind calls for some definition...I don't know why...but I decided piping was the answer. I had just enough scraps from my pirate trousers to edge the pockets. Sadly not enough to edge the hem. Then the lining fabric was a piece I found in another charity shop for a couple of pounds. It is a lightweight fabric, probably polyester but I am not sure. Once I had started cutting it I decided it was too nice to hide away as a lining and hence the reversible skirt idea was born! However you can just glimpse the floral pattern through the stripes, especially if you know it's there. I like the floral side with the pockets but the stripey side to me seems more stylish and cute. The floral fabric is heavier and so (to my mind) doesn't fall as nicely from the casing as the lining fabric does.


This is a fuller skirt than I would usually wear but I am hoping it will make great holiday wear especially as I am off to Devon at the weekend. There is plenty of room in the pockets for ice cream money, so what more do I need? I hope to enlist my age eight personal photographer to get some holiday action pics of this skirt and the rest of the SESA clothes over the next week as they are forming the mainstay of my holiday packing!


I am planning on making this skirt again in a grey or rust colour for autumn if I can find fabric with the right amount of drape.

Tuesday, 26 July 2011

Ridiculous Pirate Franken-Portfolio trousers

Warning - this is a long post, you may want to go and get a cup of tea and a biscuit before reading.


I had Sew Lisette Portfolio trousers (Simplicity 2245) on my summer essentials list. Here is the pattern drawing to show you what they look like. They are supposed to be three quarter length trousers. I started them back in May. The instructions are clear, the pattern is straightforward to follow. I worked away and they came together quickly. Too good to be true? Well, my mistakes are all my own and not down to the pattern design at all, but I tried them on before putting in the zip, they fit fine. Once I had put the zip in, uh-oh, I couldn't actually wear them and breathe out at the same time. Do you see there could be a slight problem here? They fitted fine around the hips, thighs etc , just the waistband was too tight.


So I did the mature and sensible thing...I left them screwed up in a heap down the back of the radiator for a few weeks. Then, deciding I wasn't going to let my work so far go to waste, I fished them out and tried them on again and the top picture. As you can see they are very creased from their sojourn down the back of the radiator. They also have the rough turn up before the nice neat cuff is made. I decided to lower the waist as they were too tight only at the higher part of the waist. So, off came the tabs (which I really really liked), out came the zip (which I had ironically sewn in very neatly for once), off came the waistband. I sewed up the seam where the zip had been. I made the cuffs at the trousers legs and added the tabs that had come from the waist with some nautical buttons from my stash. I liked the tabs too much to lose them.
Nautical button and tab details


Then I made a simple casing at the waist and inserted elastic. But uh-oh, now the waist was just a tiny bit too low. I wore the trousers for half a day but it was no good, too too low. Like builder's derriere low. I could have kept them like that if I wanted to spend my days pulling and twisting up my trousers.


So, taking a deep breath, I unpicked the casing, and ironed it flat. I dug though my fabric stash and found the remains of the blue fabric I had cut the trousers from. I used this to make a new waistband which was basically a long rectangle. I folded it over and inserted elastic. I know elastic waisted trousers are kind of "old lady on a coach trip to Llandudno" but it does mean I can now wear the trousers. And my shirts cover the elastic style faux pas. So maybe sadly higher waisted trousers are not for me, I see many other sewing bloggers looking fabulous in high waisted styles, but think I am going to let them pass me by for now.
Slanted front pocket

So, back to the trouser making, fed up having no pockets in many of my me-made clothes I added a slanted patch pocket to the front, using the pattern shape from the Sew U book by Wendy Mullins. This book is such a great resource as it has different pattern pieces for different pocket shapes and styles so you can quickly pick out what you want to add to an existing project. By this stage I only had a few strips of blue fabric left so I joined two with a centre seam to create enough width for the pocket. (I am hoping the centre pocket seam looks like a deliberate detail, not a make-do measure.) Then I lined the pocket with a lovely pink fabric patterned with sailing ships.
I only have a small piece of this ship fabric from the bin bags of fabric I was given back in February, I loved it so much that I saved it for a lining project like this one. I also cut out a little ship and sewed it into the pocket side seam as a little badge detail. (This is still making me smile!) I am going to try and see if I have enough fabric left to make the pocket for the other side. But for today I wore them with one pocket only - just for testing out purposes of course (nothing to do with impatience).


I think the laborious, drawn out process and seam ripping within this project makes it qualify for Jessica's Ridiculous Challenge. Plus the fact that I have finished with a pair of trousers that make my daughter shout "Ahoy there me hearties" every time she sees the buttons. ("Why you got pirate trousers?" she asked me) And plus the decidedly unstylish elastic waist, something I know my sister will despair of when she sees it.

Monday, 18 July 2011

Yay - finished objects or New/Old School Style

I have been sewing in small pockets of time for the last month, based on my Summer Essentials Sewalong Plan. And finally I have two finished objects to share. Yippeee - it is so nice to have actually been able to finish some things. I don't know what you will think but think both these items have a vintage air to them. Like many other Me-Made Month participants, I identified the need for plain tops in my me-made wardrobe. The top is Simplicity 2259 (again, sorry about that, really must try and find another pattern). It is made from some not-very nice white fabric I found in my bin bags stash. Seriously, it isn't very nice fabric, maybe it is some kind of cotton/poly blend but it is a little stiff and creases quite a lot. I would love to be able to make this top in a nice cotton lawn or cotton pique, but I am trying not to buy new fabrics and to use up the stash, so the not-very-nice fabric it is.


Lace detail


I started making the top back in May hoping to have it finished to wear in Me Made June but other things got in the way. First of all I made a peter pan collar to go on this but I made it wonky and the fabric was so thin it showed all the seams. So that went into the scrap bag. Then, I had a plan to make it with a small box pleat down the front. Then, when I rolled the neck edge and hemmed it, it looked a little clumsy so I covered it up with lace instead.


This was about the only white lace I had in my stash, most of the lace I have is creamy or coffee coloured. I have looked at this piece of lace for ages now (only about three years), wondering how to use it. I like it on this top, and think it gives it a bit of a retro look.
A view without cardigan


The skirt I made from a piece of fabric I also found in my bin bag stash. I love this fabric. It has a barkcloth texture and I am guessing it is 1960s or 50s. Despite washing and hanging out on the line over several days it still has a faint eau-de-musty to it. I kept the skirt really simple, just a rectangle with a casing and elastic for the waist because I was so reluctant to cut into this fabric! I also lined it with a very lightweight leaf patterned fabric a friend passed on to me. This may sound nice but really, believe me, the leaf pattern is old-lady blouse and not in a good way. It does make good lining fabric though.

I had hesitated over making the skirt because I liked the fabric so much. But I rationalised that it is better to give it a new lease of life than be stuck in a cupboard.


The only thing I spent money on in making these two items was the elastic and at some time I would have bought the thread. Plus two pieces of fabric rescued from being hidden away in the cupboard.